


What are you doing today that is Hi-Fi related?
- Thread starter Synaxis
- Start date
You are using an out of date browser. It may not display this or other websites correctly.
You should upgrade or use an alternative browser.
You should upgrade or use an alternative browser.
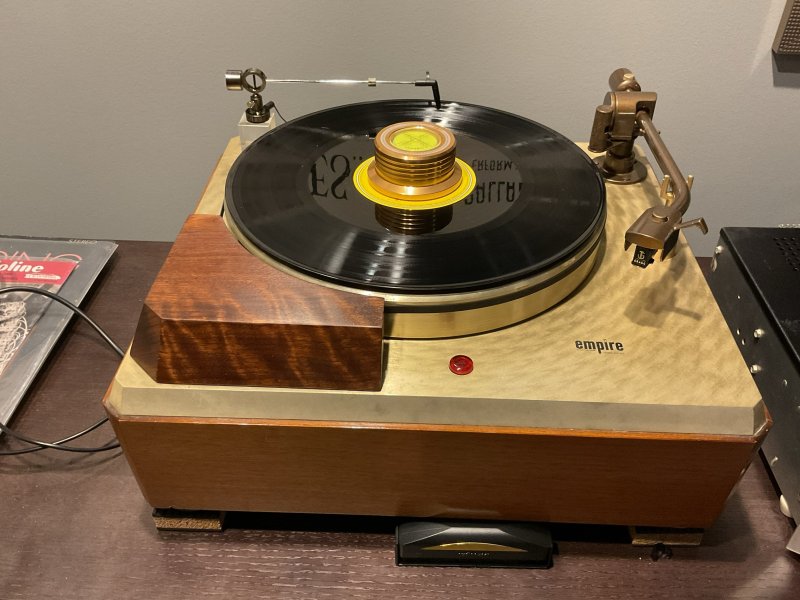
That brings back horrible memories of a little over 4 years ago…for my back, that is. :\As I wait for the contractor to give me a start date for listening room renovation, all I can do is stare at the boxed-up record collection and head upstairs to stream on the meager 'system' in the living room.
View attachment 156501View attachment 156501View attachment 156502View attachment 156502
The plus side is that you have one heckuva a “Christmas morning” coming when it’s all done.

Yes, 70 boxes is a lot of boxes. It took a while. Gotta have the proper boxes and a craft tape dispenser. They're all going to a mover's storage facility along with furniture, cabinets, etc. No room to keep the stuff here. All the electronics are staying here, though. Upstairs Spotify is better than nothing but next to it....good luck! Holy Mackerel that's a lotta boxes. It always looks worse to me when they're boxed. You can't see the spines, colors, grouping on the shelves, etc. Just boxes. Gives me the shakes. Enjoy the upstairs system!
until there is nirvana Y (update of X) and the cycle starts again...Just gave FedEx my (two) Shunyata Denali v2s to go back to their birthplace and be reincarnated to Denali Xs. Hopefully climbing the evolutionary chain towards nirvana.
Ah, the never ending karmic wheel!!until there is nirvana Y (update of X) and the cycle starts again...
Finished with system building, so just listening to music. How sweet it is!
As Bob Marley sang (different context but applies):Ah, the never ending karmic wheel!!
Now you get what you want,
Do you want more? (want more)
Now you get what you want,
Do you want more? (want more)
You think it's the end,
But it's just the beginning.
You think it's the end,
But it's just the beginning.
The thought of doing that with my (one) Denali leaves me feeling uneasy. I'm thinking of getting another Akiko Audio ground enhancer to use in the same outlet as the computer/monitor/printer/LED desk lamp. Probably will try that (easy placement but a month of settle in) before considering the Denali X upgrade.Just gave FedEx my (two) Shunyata Denali v2s to go back to their birthplace and be reincarnated to Denali Xs. Hopefully climbing the evolutionary chain towards nirvana.
Since my current Akiko didn't play well with the Denali (which, I assume, is doing something similar plus isolating each outlet), I moved it to the outlet for the router/TV/TV cable box. Brought very nice (surprising) improvements. This little voodoo device has convinced me there is a LOT of noise traveling via the ground.
Looking forward to your impressions. What is everything plugged into in the meantime?
Tom,
Another question for you. How do you establish a centerline for the room without using the walls?
How would extra lasers help in that?
Hey, Lee. So, unless I am mistaken, your laser has one vertical and one horizontal line. That's really all one would ever need. The extra lasers assist with other measurements I personally do, and offer a different way to do things. A quicker way, in some instances for me. I try to take all of the walls and the flooring out of the equation.
In full disclosure, my measuring kit consists of the following;
DigiPas DWL-1300XY 2 axis precision digital level
Takamine GM160 Pro self leveling 16 line laser
Bosch Professional GLM20 digital tape measure
Stanley Powerlock tape measure
Johnson 40-6184 laser level
The self leveling laser (Takamine) has 360 degree laser lines that go across the entire room, ceiling and floor, if unobstructed. I use little dots that come on a wax sheet, hundreds of dots per sheet. I will take a non surface damaging self adhesive dot and place it on all 4 sides of the walls, where the lasers are pointed. I do this, after doing a rough placement of the tripod in the room. Then I will take the Bosch laser distance measure and find the distance from that center line to various places in both of the sidewalls. I will adjust the Takamine to find the average centerline and mark all 4 spots on the walls again, after the centerline has been firmly established as a true (on average) centerline. Now the sidewalls are no longer part of the equation and the centerline is used for reference, instead of the walls....which can and usually does deviate from a perfect line and be skewed or angled, bumped out or in, etc..
This is all assuming that the speakers are already within the last 1% to a maximum 2% of final location, and that the proximity to the walls, room nodes, and distance from the front wall have already been optimized. That is of paramount importance before I start any of this.
Once the centerline has been established, I move the tripod to where the side to side vertical laser is right at the outside front corners of each speaker and check to see if the centerline is still on point (again, using those little dots as reference). If it isn't, then the speakers are not where they are supposed to be. At this point, you never deviate from your centerpoint from here on out. Adjust or move your speakers to where they are both on an exacting 90 degree plane with the centerline. That vertical laser that resides on the front outside of each speaker should be touching the speaker the whole way up. Half of the laser should ride the speaker's outside edges and the other half of the laser line should still be visible on the wall.
Now, all walls are out of the equation. Your speakers are roughly where they should be. This is where I stop, sit and listen to a few select tracks to make sure that any movement of the speaker or speakers didn't mess with the optimal sound too much.
*At this point, if the sound didn't get worse (it usually starts getting better/more precise), I will go through the rest of my ritual measuring the distance between each speaker and the closest point of each speaker to the middle of that centerline, and then the distance from the listening position (at ear level) to the dead center of the speakers that are on the same exact level of the horizontal laser beam (all parameters MUST be precise - with the distance from speaker to speaker being less than the distance away from the listening position.) What relationship that is, has to do with the room size and dimensions/acoustical properties themself that should have already been completed prior to starting this.
Also, I adjust the height of the speakers to ensure that one speaker is not higher or lower than the other (using the horizontal laser). Then I match up, using the same unmoved horizontal laser, the height of my chair for my ears at the listening position. My preferred height for optimal sound on my speakers and in my room is my ears at precisely the same level as the tweeters when I am seated in the listening position.*
Then I listen again to make sure all is still well and that I am moving in the right track. Now for a little bit of some refined tuning. The speakers during the intial set up were generally placed to where the Johnson laser went from the side of the speakers to the centerline near the listening position (again, marked by one of those small dots for each speaker). Using only the outermost front spike of each speaker (toward the listening position) as the pivot point for adjustments of the speaker, I will start to refine the toe in. Instead of typing all of this out again, I will just share a screenshot for those who may want additional information on optimizing the toe in (or how I go about it). Please disregard if you are already a pro or are already well versed with this.

After the toe in has been optimized, I sit back down and listen to more than just a few reference tracks and see if I am still on point, or if further basic adjustments are needed. I'll usually hit a couple of genre's from a single singer with a small accompaniment to a full big band, to a selection with heavy passages, to a superbly crafted imaging selection to whatever I want to test the system out with at the time. Once satisfied with the results (I have only had to go back to square one once), then I will get really an*l about the measurements. It is extreme fine tuning at this point.
I break out the Digi-Pas and calibrate the levelness of the speakers to the inth degree. Adjusting and rechecking all measurements to make sure one or more doesn't get too far off track. If they do, I readjust to where they get back on track. These readjustments are done in very small increments because just a small twist of one spike can alter the levelness of the speaker, which can throw the distance off on other measurements. This part is the real PIA and ultimate time killer, but when you take the time to do it, the rewards are SO worth it IMO/IME.
As soon as the toe in is spot on, the measurements are verified, even smaller incremental adjustments are made until everything is perfect, then double and triple checked on all parameters. THAT's when I strip all measurement tools away (after placing all of the dots in their final position) and do a final listen. I have always been amazed at how much of a difference this makes to the end result as to what hits these ears. It does take time. Anywhere from 3 to 6 hours from start to finish but the end result is completely worth the time and energy spent. The before and after change is stunningly awesome.
Please note; if you go and measure the distance from the speakers to the back wall (for instance), it may not reflect a perfect measurement with each speaker. That does not matter. What the most important thing is, is that your walls are out of the equation and that the relationship between the speakers and the listener is of utmost importance. The room may just be ever so slightly rhomboid or (for example) a sheetrock tape seam may be sending the measurement from the wall off.
Tom
* - denotes editing within these two asterisks where I edited the post and clarified a bit more accurately.
Last edited:
Tom,Hey, Lee. So, unless I am mistaken, your laser has one vertical and one horizontal line. That's really all one would ever need. The extra lasers assist with other measurements I personally do, and offer a different way to do things. A quicker way, in some instances for me. I try to take all of the walls and the flooring out of the equation.
In full disclosure, my measuring kit consists of the following;
DigiPas DWL-1300XY 2 axis precision digital level
Takamine GM160 Pro self leveling 16 line laser
Bosch Professional GLM20 digital tape measure
Stanley Powerlock tape measure
Johnson 40-6184 laser level
The self leveling laser (Takamine) has 360 degree laser lines that go across the entire room, ceiling and floor, if unobstructed. I use little dots that come on a wax sheet, hundreds of dots per sheet. I will take a non surface damaging self adhesive dot and place it on all 4 sides of the walls, where the lasers are pointed. I do this, after doing a rough placement of the tripod in the room. Then I will take the Bosch laser distance measure and find the distance from that center line to various places in both of the sidewalls. I will adjust the Takamine to find the average centerline and mark all 4 spots on the walls again, after the centerline has been firmly established as a true (on average) centerline. Now the sidewalls are no longer part of the equation and the centerline is used for reference, instead of the walls....which can and usually does deviate from a perfect line and be skewed or angled, bumped out or in, etc..
This is all assuming that the speakers are already within the last 1% to a maximum 2% of final location, and that the proximity to the walls, room nodes, and distance from the front wall have already been optimized. That is of paramount importance before I start any of this.
Once the centerline has been established, I move the tripod to where the side to side vertical laser is right at the outside front corners of each speaker and check to see if the centerline is still on point (again, using those little dots as reference). If it isn't, then the speakers are not where they are supposed to be. At this point, you never deviate from your centerpoint from here on out. Adjust or move your speakers to where they are both on an exacting 90 degree plane with the centerline. That vertical laser that resides on the front outside of each speaker should be touching the speaker the whole way up. Half of the laser should ride the speaker's outside edges and the other half of the laser line should still be visible on the wall.
Now, all walls are out of the equation. Your speakers are roughly where they should be. This is where I stop, sit and listen to a few select tracks to make sure that any movement of the speaker or speakers didn't mess with the optimal sound too much. At this point, if the sound didn't get worse (it usually starts getting better/more precise), I will go through the rest of my ritual measuring the distance between each speaker and the middle of that centerline and the distance at the listening position to the speakers (all parameters MUST be equidistant to within a knat's posterior or as close as humanly possible) Also, the distance between each speaker from that centerline, and height of the speakers to ensure that one speaker is not higher or lower than the other (using the horizontal laser). Then I match up, using the same laser, the height of my ears at the listening position. My preferred height for optmal sound on my speakers and in my room is my ears at precisely the same level as the tweeters when I am seated in the listening position.
Then I listen again to make sure all is still well and that I am moving in the right track. Now for a little bit of some refined tuning. The speakers during the intial set up were generally placed to where the Johnson laser went from the side of the speakers to the centerline near the listening position (again, marked by one of those small dots for each speaker). Using only the outermost front spike of each speaker (toward the listening position) as the pivot point for adjustments of the speaker, I will start to refine the toe in. Instead of typing all of this out again, I will just share a screenshot for those who may want additional information on optmizing the toe in (or how I go about it). Please disregard if you are already a pro or are already well versed with this.
View attachment 156691
After the toe in has been optimized, I sit back down and listen to more than just a few reference tracks and see if I am still on point, or if further basic adjustments are needed. I'll usually hit a couple of genre's from a single singer with a small accompaniment to a full big band, to a selection with heavy passages, to a superbly crafted imaging selection to whatever I want to test the system out with at the time. Once satisfied with the results (I have only had to go back to square one once), then I will get really an*l about the measurements. It is extreme fine tuning at this point.
I break out the Digi-Pas and calibrate the levelness of the speakers to the inth degree. Adjusting and rechecking all measurements to make sure one or more doesn't get too far off track. If they do, I readjust to where they get back on track. These readjustments are done in very small increments because just a small twist of one spike can alter the levelness of the speaker, which can throw the distance off on other measurements. This part is the real PIA and ultimate time killer, but when you take the time to do it, the rewards are SO worth it IMO/IME.
As soon as the toe in is spot on, the measurements are verified, even smaller incremental adjustments are made until everything is perfect, then double and triple checked on all parameters. THAT's when I strip all measurment tools away (after placing all of the dots in their final position) and do a final listen. I have always been amazed at how much of a difference this makes to the end result as to what hits these ears. It does take time. Anywhere from 3 to 6 hours from start to finish but the end result is completely worth the time and energy spent. The before and after change is stunningly awesome.
Please note; if you go and measure the distance from the speakers to the back wall (for instance), it may not reflect a perfect measurement with each speaker. That does not matter. What the most important thing is, is that your walls are out of the equation and that the relationship between the speakers and the listener is of utmost importance. The room may just be ever so slightly rhomboid or (for example) a sheetrock tape seam may be sending the measurement from the wall off.
Tom
Thank you for the detailed reply!
This seems to be a good approach but it requires more gear than Jim Smith’s method. By using a crosshair on a tripod, Jim’s approach eliminates the need for more than one laser level. That has implications for travel to out of state clients.
For toe-in we are on the same page but I laser measure to the bottom left and right corners of each speaker. I may also double check the same distances to the upper module.
As for the dots, I don’t find them necessary for Jim’s method.
A couple of critical things I think you may want to consider…
1. At the very start, use the Studio Six Digital app with RTA function on an ipad to find the smoothest response in lower bass using a pink noise track.
2. Use Jim Smith’s 83% placement rule from the chair to come up with some early positions for the loudspeakers.
You are welcome and understood.
I use the dots mainly because if I ever need to redo anything (let's say I need to move a speaker to get at something or I get a new component that changes things significantly enough to prompt a change), they are there and I can skip a whole bunch of steps in the process. They are so small, I don't really even notice them. They are more of a time saver for later down the road than anything.
My i-Pad is one of those older models that I got just to use as a remote control for the streamer when my other devices were low on battery power. For any other use than that? It's a joke. So, no can do with your suggestion unfortunately. I do have REW, so there is that.
I also used Jim's rule (along with others I have used throughout the years) and some of his suggestions for initial speaker placement. I was actually pretty close to begin with, but then after reading his book and thinking on it for a stint, I tried some things I learned from him (Thanks Jim!). I only ended up moving the speakers forward about an inch and a half, and out by about a half inch, then did my ritual. It worked wonders.
What prompted me to do it all over again was that I installed some new gear and the sound was "off" from what it was before. It sounded better in many aspects but the frequencies and speaker/room interaction changed to where there were all of a sudden some deficiencies that didn't exist before the new gear came in. So, I waited for them all to completely burn in and went to town, starting from scratch again. Now I have all of the attributes of the new gear, with none of the deficiencies that reared their ugly head after the new gear came in. That was about 6 months ago or so. I am still tickled pink everytime I go back to listen.
Tom
We have found a 1/32 inch difference can make a sonic improvement.You are welcome and understood.
I use the dots mainly because if I ever need to redo anything (let's say I need to move a speaker to get at something or I get a new component that changes things significantly enough to prompt a change), they are there and I can skip a whole bunch of steps in the process. They are so small, I don't really even notice them. They are more of a time saver for later down the road than anything.
My i-Pad is one of those older models that I got just to use as a remote control for the streamer when my other devices were low on battery power. For any other use than that? It's a joke. So, no can do with your suggestion unfortunately. I do have REW, so there is that.
I also used Jim's rule (along with others I have used throughout the years) and some of his suggestions for initial speaker placement. I was actually pretty close to begin with, but then after reading his book and thinking on it for a stint, I tried some things I learned from him (Thanks Jim!). I only ended up moving the speakers forward about an inch and a half, and out by about a half inch, then did my ritual. It worked wonders.
What prompted me to do it all over again was that I installed some new gear and the sound was "off" from what it was before. It sounded better in many aspects but the frequencies and speaker/room interaction changed to where there were all of a sudden some deficiencies that didn't exist before the new gear came in. So, I waited for them all to completely burn in and went to town, starting from scratch again. Now I have all of the attributes of the new gear, with none of the deficiencies that reared their ugly head after the new gear came in. That was about 6 months ago or so. I am still tickled pink everytime I go back to listen.
Tom
Oh, I will not argue that! In fact, I would concur....and might respectfully argue that one can detect even tighter tolerances. @sbnx has written extensively about this very thing, and I have joined in with his very long discussion about this here >>> https://www.whatsbestforum.com/threads/detailed-speaker-setup-and-optimization.36935/ His room is much bigger than mine, so smaller tolerances are more noticeable to him than in my room. But we both notice the same things sonically when it's dialed in correctly.
I dive into it a bit deeper in this post as to why the change can be so significant, even though the movement of the speaker is so small >>> https://www.whatsbestforum.com/threads/detailed-speaker-setup-and-optimization.36935/post-1012951
Tom
I dive into it a bit deeper in this post as to why the change can be so significant, even though the movement of the speaker is so small >>> https://www.whatsbestforum.com/threads/detailed-speaker-setup-and-optimization.36935/post-1012951
Tom
For those of us who don’t necessarily sit in a sweet spot (with our heads locked in a vice), is precise speaker placement is still key? I tend to think so, though it may be counter-intuitive.
In my experience, no. The more precise you dial it in, the more you seemingly have to sit however you would like. Having your head in a vise isn't needed for an optimum listening experience.
You can tell before you even walk into the room, that they are set correctly. Everything just sounds more like "live", if you will, and not reproduced.
Tom
You can tell before you even walk into the room, that they are set correctly. Everything just sounds more like "live", if you will, and not reproduced.
Tom
So in your experience - yes (not no) - this is my experience as well, as I explained above.In my experience, no. The more precise you dial it in, the more you seemingly have to sit however you would like. Having your head in a vise isn't needed for an optimum listening experience.
You can tell before you even walk into the room, that they are set correctly. Everything just sounds more like "live", if you will, and not reproduced.
Tom

Similar threads
- Replies
- 125
- Views
- 7K
- Replies
- 1
- Views
- 692
- Replies
- 71
- Views
- 12K
- Replies
- 6
- Views
- 1K
- Replies
- 27
- Views
- 3K
| Steve Williams Site Founder | Site Owner | Administrator | Ron Resnick Site Owner | Administrator | Julian (The Fixer) Website Build | Marketing Managersing |