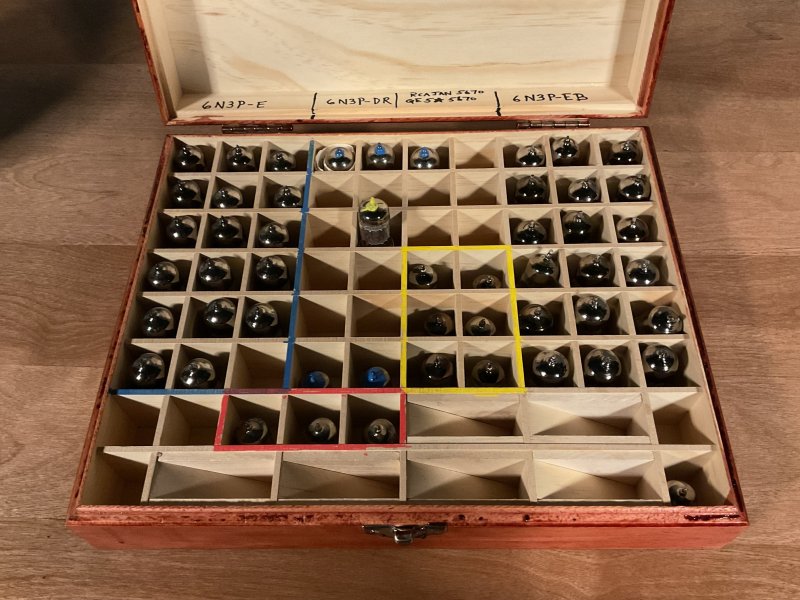
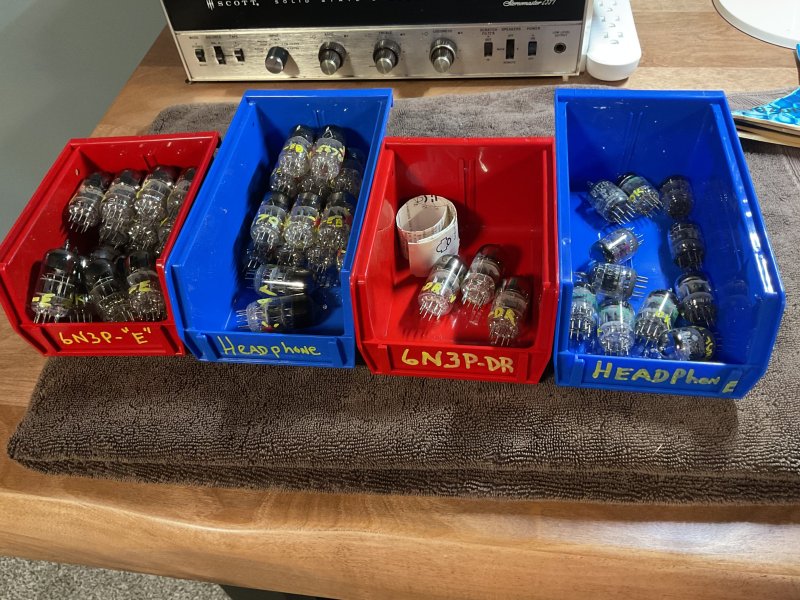
For some reason, testing, labeling, and organizing my vintage tubes really relaxes me and is a stress reliever.
I'll actually test the tubes and keep a spreadsheet of their results across all the different testers.
Now that I've bought (and sold some of them already) 7 tube testers, I've developed quite the cleaning process that seems to work. Obviously for ones that have vinyl on the outside I wouldn't use the polishes on them. However for the all metal military ones, this is my process - It’s part science, part art — and a whole lot of patience.
Dealing with these testers - many of which are 70+ years old, it’s a delicate balance between having enough cleaning power to cut through decades of grime, but with a gentle hand to preserve every beautiful bit of original history — the factory lettering, the stamps, the wear that tells a story.
In this photo, you’re looking at Steps 3, 4, and 5 of my multi-stage process. Here’s the full process I take every tester through (for ones with vinyl on the outside I have a different process for that part):
 Step 1: External Metal Case Cleaning
Spray, brush, and wipe down the case with a powerful undiluted APC. Sometimes it takes several rounds depending on how neglected the case has been.
Step 2: Surface Prep
Use a special surface prep spray to remove any cleaner residue and prepare the surface for polishing. This step is crucial — skip it and the polishes won’t bond right. Again several applications will be needed to get the surface clean and ready.
Step 3: Cutting Polish
With a coarse pad and Menzerna cutting polish on my polisher ( have two -a 3" Griots G13 polisher and a FLEX 1" rotary polisher for getting the inside lids), I start the heavy lifting. Years of scuffs and oxidation start to melt away. But carefully as this is powerful stuff and will easily take off special writing and markings that you want to keep - and burn right through the paint to bare metal! I learned how to properly use a polisher when I had a side car detailing business when I was young.
Step 4: Finishing Polish
Switch to a medium pad and Menzerna finishing polish on my polishers. This removes any remaining haze and brings out that deep, vintage shine.
Step 5: Sealant
Now with a smooth pad on my polisher, I apply Menzerna sealant to lock in the finish. Let it dry 30 minutes, wipe it off, and then let it cure for several hours.
Step 6: Ceramic Wax
Once the surface is prepped, I apply two layers of spray ceramic wax for that rich, glossy depth. The one I use is part man made and part real carnauba for the best of both worlds of additional shine.
Step 7: Interior Time
Pop the lid and repeat the process on the inside lip of the tester. Many forget this part — but it matters to clean and treat the rubber gasket on the military testers. I also clean the hinges and apply just a dab of oil
Step 8: Faceplate & Knobs
Using specialty interior cleaners, I slowly increase strength (if needed) until everything’s clean — even going as far as Magic Eraser (which is a mild polisher and can take off the lettering if not careful) and APC (All Purpose Cleaner) when necessary. Usually takes 5-8 rounds to get fully clean, sometimes more.
Step 9: Final Prep
Wipe everything down one more time with the surface prep spray again to make sure all cleaners have been removed, then apply a car interior protectant (matte finish) to keep it clean and easier to maintain moving forward.
Total time?
Easily 5+ hours per tester. But I enjoy the results and the time spent carefully cleaning each one.

I'll actually test the tubes and keep a spreadsheet of their results across all the different testers.
Now that I've bought (and sold some of them already) 7 tube testers, I've developed quite the cleaning process that seems to work. Obviously for ones that have vinyl on the outside I wouldn't use the polishes on them. However for the all metal military ones, this is my process - It’s part science, part art — and a whole lot of patience.
Dealing with these testers - many of which are 70+ years old, it’s a delicate balance between having enough cleaning power to cut through decades of grime, but with a gentle hand to preserve every beautiful bit of original history — the factory lettering, the stamps, the wear that tells a story.
In this photo, you’re looking at Steps 3, 4, and 5 of my multi-stage process. Here’s the full process I take every tester through (for ones with vinyl on the outside I have a different process for that part):
Spray, brush, and wipe down the case with a powerful undiluted APC. Sometimes it takes several rounds depending on how neglected the case has been.
Use a special surface prep spray to remove any cleaner residue and prepare the surface for polishing. This step is crucial — skip it and the polishes won’t bond right. Again several applications will be needed to get the surface clean and ready.
With a coarse pad and Menzerna cutting polish on my polisher ( have two -a 3" Griots G13 polisher and a FLEX 1" rotary polisher for getting the inside lids), I start the heavy lifting. Years of scuffs and oxidation start to melt away. But carefully as this is powerful stuff and will easily take off special writing and markings that you want to keep - and burn right through the paint to bare metal! I learned how to properly use a polisher when I had a side car detailing business when I was young.
Switch to a medium pad and Menzerna finishing polish on my polishers. This removes any remaining haze and brings out that deep, vintage shine.
Now with a smooth pad on my polisher, I apply Menzerna sealant to lock in the finish. Let it dry 30 minutes, wipe it off, and then let it cure for several hours.
Once the surface is prepped, I apply two layers of spray ceramic wax for that rich, glossy depth. The one I use is part man made and part real carnauba for the best of both worlds of additional shine.
Pop the lid and repeat the process on the inside lip of the tester. Many forget this part — but it matters to clean and treat the rubber gasket on the military testers. I also clean the hinges and apply just a dab of oil
Using specialty interior cleaners, I slowly increase strength (if needed) until everything’s clean — even going as far as Magic Eraser (which is a mild polisher and can take off the lettering if not careful) and APC (All Purpose Cleaner) when necessary. Usually takes 5-8 rounds to get fully clean, sometimes more.
Wipe everything down one more time with the surface prep spray again to make sure all cleaners have been removed, then apply a car interior protectant (matte finish) to keep it clean and easier to maintain moving forward.
Total time?
Easily 5+ hours per tester. But I enjoy the results and the time spent carefully cleaning each one.